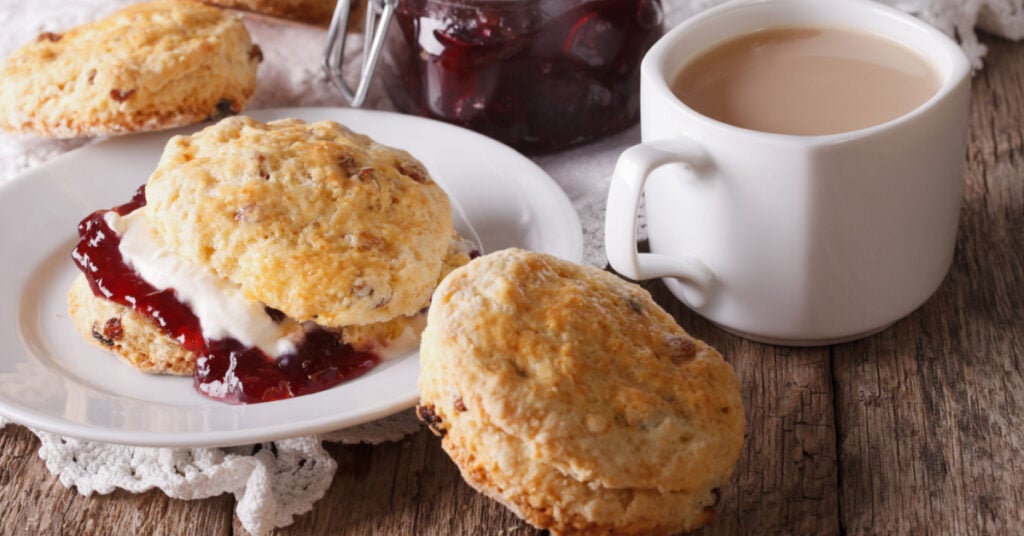
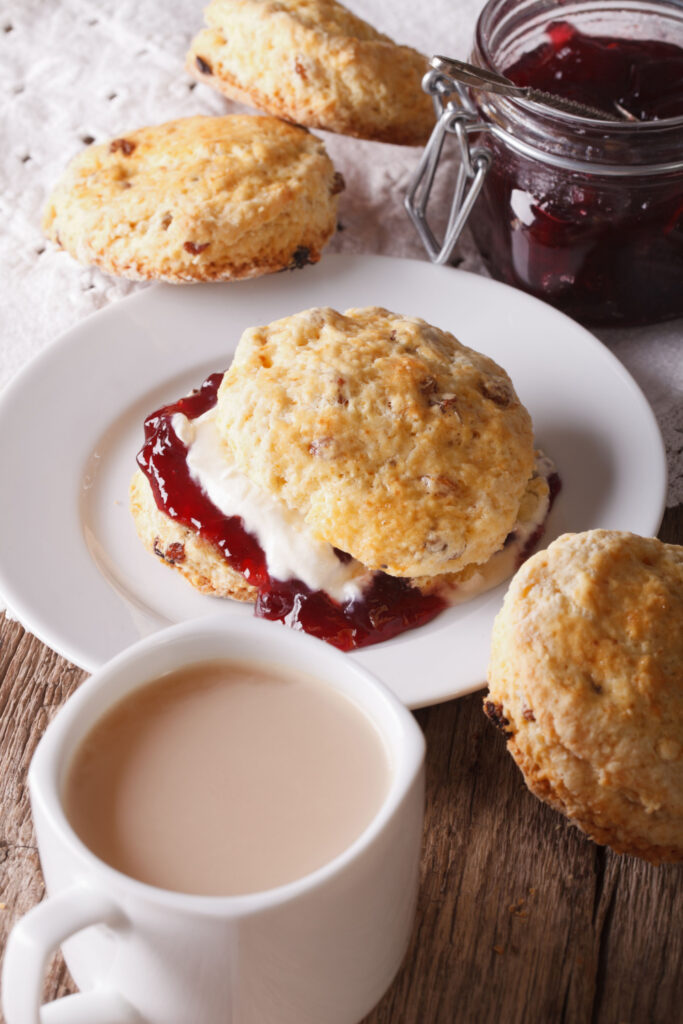
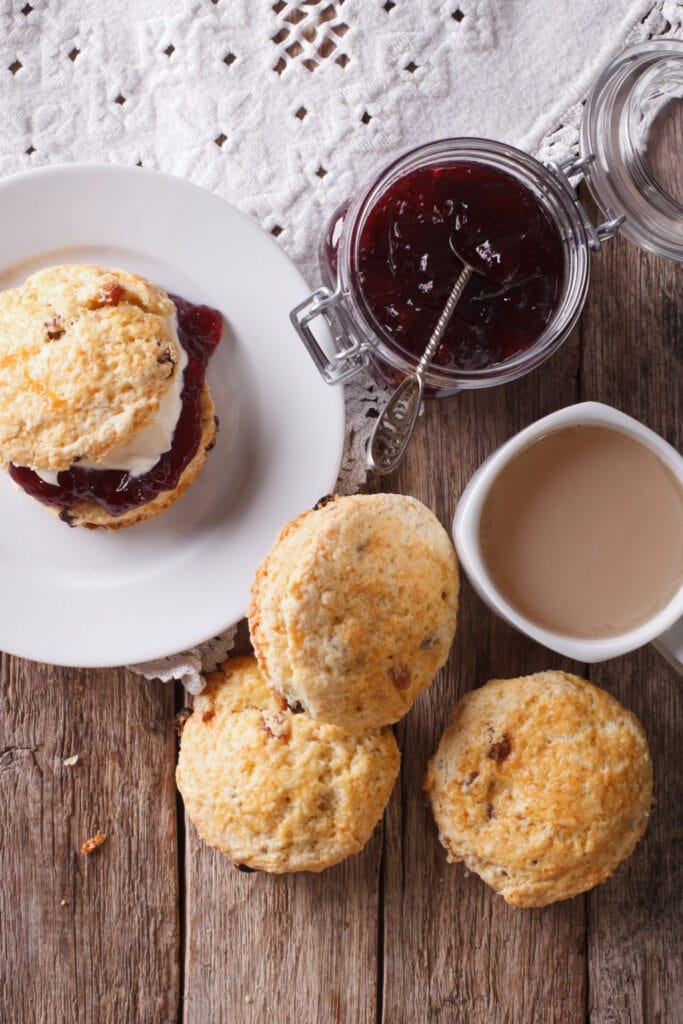
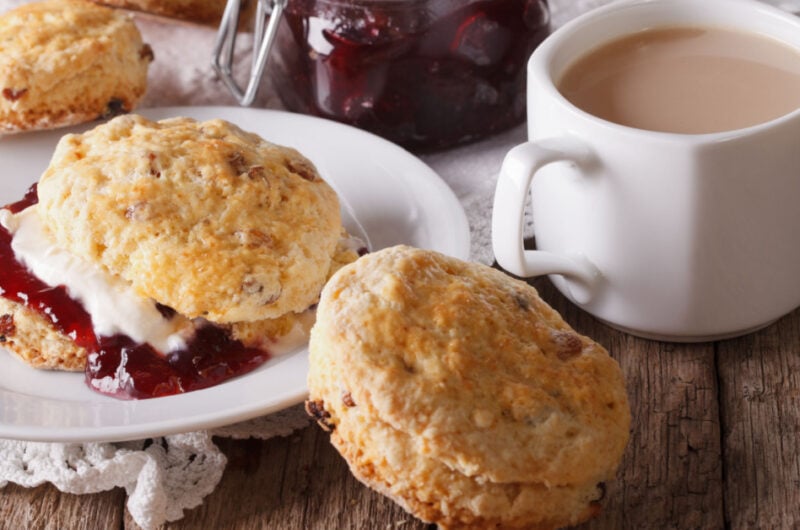
Serve them warm with jam and clotted cream for the ultimate treat! In case you’re wondering, the main difference between biscuits and scones is that the latter usually contains eggs (and a little more sugar). That makes them just a little richer, and they’re also typically sweeter. But that’s not always the case! Take this recipe, for example. It’s wonderfully rich and lightly sweet, but you’ll get that with buttermilk rather than eggs. Make a batch today, and I know you’ll fall in love.
Easy Buttermilk Scones Recipe
There’s nothing like the smell of freshly baked scones in the morning. And when those scones are made with rich, creamy buttermilk, the aroma is even more tantalizing. The key to making the perfect buttermilk scone is to use high-quality ingredients and to let the flavors combine before adding any extras. The result is a light, fluffy scone that’s bursting with flavor. The subtle tang of the buttermilk pairs perfectly with the sweetness of the dried fruit, making the scones truly irresistible. Whether you enjoy them plain or topped with jam and cream, buttermilk scones are a delicious treat any time of the day.
Ingredients
Flour – Flour helps to absorb moisture from the other ingredients, which prevents the scones from becoming too wet or dense. Also, flour gives the scones structure, so they spring up nice and tall in the oven.
Sugar – To make the scones lightly sweet and to help with that light and fluffy texture. When combined, buttermilk, baking powder, and sugar give the scones their signature rise.
Salt – A touch of salt will enhance the flavor in pretty much any baked good – and scones are no exception.
Baking Powder & Baking Soda – To add lift and lightness. You’ll need baking powder and baking soda to get a fluffy finish.
Unsalted Butter – Butter brings richness and flavor. If you only have salted butter, just leave the additional salt out of the recipe.
Buttermilk – Buttermilk gives the scones moisture and tang. The acidity in this fermented milk tenderizes the dough (just like it tenderizes meat), leaving you with wonderfully airy scones with a rich taste.
Currants – Currants have a tart, slightly sweet flavor that’s perfect for offsetting the richness of buttermilk scones. That said, you can use sultanas or raisins if that’s all you have.
Heavy Cream – Brush a small amount over the top for the perfect golden finish. Or use milk or a simple egg wash.
How to Make Buttermilk Scones
Believe it or not, making scones is a breeze! Here’s what you need to know:
- Mix all the dry ingredients together. Whisk or stir the flour, salt, sugar, baking powder, and baking soda in a large bowl. This ensures all ingredients are distributed equally and that you don’t have any lumps.
- Use a pastry cutter to add the cold butter to the dry ingredients. The butter should be cold; otherwise, the dough will be too soft. Using cold butter ensures the scones have a flaky texture. And using a pastry cutter ensures you don’t over-mix the dough.
- Add the buttermilk and combine gently. Pour the buttermilk into the dough and gently mix until almost completely combined. It should look shaggy – not like a smooth dough.
- Let the dough rest, then add the fruit. Give the dough 5-10 minutes to rest, then add the currents. Stir until well distributed and pour the dough out onto a floured surface. Gently press the dough until it looks uniform (don’t knead it like bread dough).
- Use your hands to press the dough into a circle, about 3/4-1 inches thick. Flatten the dough into a circle, using your fingers to smooth the edges slightly.
- Cut the dough into portions. Cut wedges, like a pizza, until you have 8-12 portions. Then, gently pull them apart and place them on a lined baking sheet.
- Brush with heavy cream. Cream, milk, or egg wash will work here and give the scones a nice golden color. You can also use buttermilk for brushing, and feel free to sprinkle extra sugar over the top.
- Refrigerate the dough before baking Refrigerate for at least 15 minutes to avoid overspreading. If the scones go in the oven while the dough is soft, they won’t rise and become fluffy.
- Bake until lightly golden-brown The scones need about 12-15 minutes, depending on how big you cut them.
Tips and Tricks for the Best Scones
Use a biscuit cutter or sharp knife to cut the portions. If you use something dull, like a glass, it will squash the dough, and they won’t rise evenly.
Be careful not to over-mix the dough, and remember it should be quite shaggy. The more you mix, the tougher the scones will be.
Ensure the butter is cold – not room temperature. If you use soft butter, the dough will be too warm, and the scones won’t rise.
Use an insulated baking sheet or place two sheets together to prevent scones from overbaking on the bottom. Also, bake them in the middle of the oven for the best results.
How to Freeze Scones
It’s possible to freeze scones before and after baking. So if you want to make some in advance, go for it! Here’s how: Freezing Before Baking Make the recipe as stated, but do not brush the dough with cream or egg wash. Instead, grab a baking sheet, put the portions on with parchment, and freeze for 60 minutes. Once they’re solid, transfer them to a freezer-friendly ziplock bag. When you’re ready to bake, just pop them in the oven and bake them from frozen! Just add a few extra minutes to the baking time. Freezing After Baking Make the dough and bake the scones as stated in the instructions. Then, leave them to cool completely on a wire rack. They should be totally cold, not just cool. Then, wrap the scones in plastic wrap and place them in freezer bags or an airtight container. When it’s time to thaw, just leave them at room temperature for a couple of hours or in the refrigerator overnight. Heat them up in a microwave for 30 seconds or in an oven for 10 minutes at 300 degrees F.
Storing and Reheating Buttermilk Scones
Use an airtight container or plastic wrap (wrap individually), and keep baked scones at room temperature for up to 5 days. You can also keep them in the fridge to prolong the expiry date. But then you may want to warm them slightly before serving. Reheat scones in the oven for 5-10 minutes at 300 degrees F, or microwave them for 15-30 seconds. I like to wrap them in slightly damp paper towels to preserve moisture.
More Baking Recipes You’ll Love
Cracker Barrel BiscuitsIna Garten’s Banana BreadPumpkin Chocolate Chip MuffinsBasic Scone Recipe (+ 7 Flavors!) Click on a star to rate it!
Average rating 5 / 5. Vote count: 1 No votes so far! Be the first to rate this post.
Share on social media: Let us improve this post!